This is a very ‘quick start’ guide to some common WordPress Content updates you might want to make. The best bit? It’s really easy! There’s nothing to be afraid of when editing content.
Please do read it in conjunction with the WordPress official documentation! This is an excellent starting point: https://wordpress.org/support/article/wordpress-editor/
What’s Covered?
Just 2 things.
- Logging in to your website and updating existing content
- How to create new content, in particular posts (like this one)
Log into the WordPress admin area
To edit the website, the first thing you need to do is log in. The default wordpress login is disabled for site security. I will give you the site login url once your website is complete.
If you choose to support your own website going forward I will set you up as an administrator on the website. Should you wish me to support it, I’ll set you up with the most appropriate role so you can make content updates and manage your business (Websites where you need to manage accommodation booking require administrator access, for example). If you specifically want administrator access, I will set you up with that.
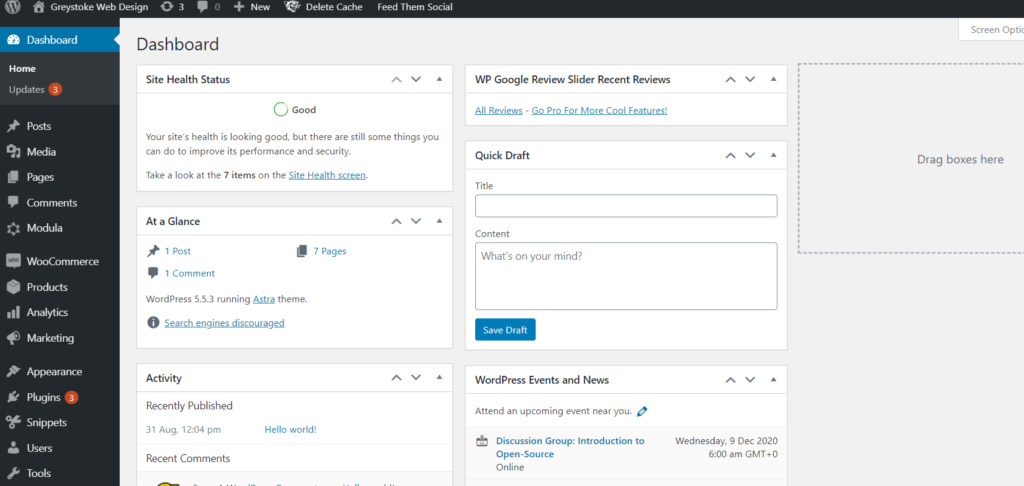
When you log in you will see a screen that looks something like this (actual websites will vary): the left hand panel is where you select what you want to do

Edit Pages and Posts
Pages and Posts are the 2 common things to edit.
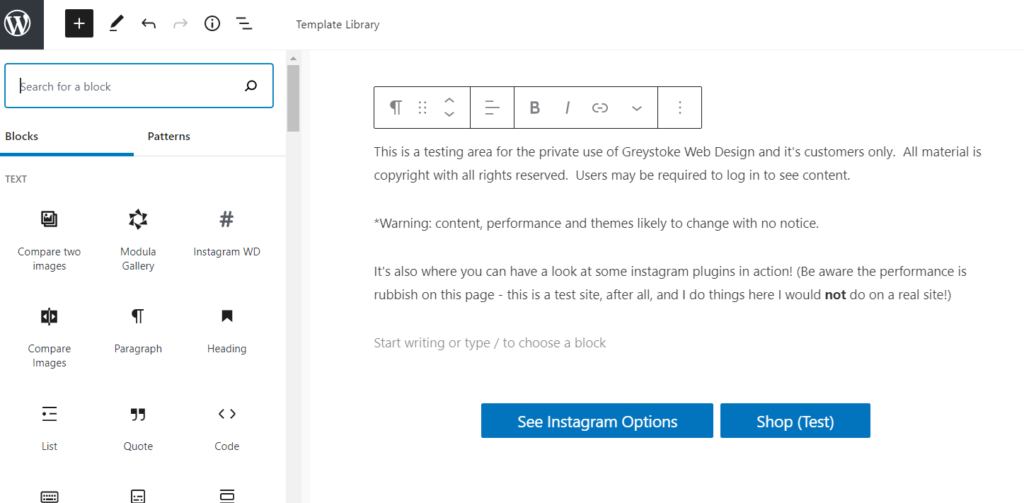
Click on pages on the left hand side, and hover over the page you want to edit. Select ‘edit’ to open the “Gutenberg Block Editor”. You can read more about it here: https://wordpress.org/gutenberg/
From here you can easily update existing text, or change images on pages. To add a new text block, select the + sign in the top left and then “paragraph”.

It’s up to you how much you want to edit the site. If you break things, I can try to help fix them for you. Be careful adding new images, as they may need to be properly optimised to ensure the website loads quickly. And stay clear of code blocks (they’re easy to spot!).
Adding links to text or images can be done easily as described here: https://wordpress.com/support/wordpress-editor/links/
Top tip: always open links in a new tab if they are NOT on your own website.
Adding Links to emails or phone numbers
Linking to an email address or a phone number follows the same basic principles as above, but the link content needs to be slightly different. To link to a phone number prefix the number with tel: and to link to an email address prefix the email with mailto: – so “tel:07840940415” would be the link for our phone number, or “mailto:” for our email.
Disclaimer: this information and the screenshots were taken at a particular point in time. WordPress may have changed things, and I would urge you to consult the official links to see up to date information. WordPress online support is excellent and should nearly always be your first port of call.
Adding New Posts
Typically you will want to add new content where there is an event calendar, or a news blog or other post feature on your website. Once example here is the Eden Valley Mountaineering Club website I built, which has Events, and also custom posts to allow Crag Access Information to be quickly updated and new content uploaded.
The principles are straightforward. You can navigate to the left hand menu, find the post type you want to create, and ‘add new’. Or you can navigate to the ‘all posts’ option to see a list of posts. You can then hover over one and ‘clone’ it so that you don’t start from scratch. You can then just amend the content on your new draft as required and republish. This last way has the advantage of cloning any additional information such as the post ‘category’ information.
Post categories can be used to filter posts – as an example, have a look at the Greystoke Village website, which uses different post categories to display relevant information on different pages:
The church page filters posts and events relating to the church: https://www.greystokevillage.co.uk/church/
The home page shows ‘news’ category posts: https://www.greystokevillage.co.uk/
Summary
It’s easy to add a new post or event, but sometimes the smart thing to do is clone an existing one to give you a head start and make sure you don’t forget to set any extra data like the post category. If you need to set or change category information, you can do this via the ‘quick edit’ option on the post listings page, or via the right hand menu options on the editing screen.
If in doubt, read the WordPress guide! https://wordpress.org/support/article/writing-posts/
See Also …
You might also want to have a look at these articles covering other specific types of WordPress content updates:


